Sumo-X Swing arm installation
Honda Fury
(customer arm must be sent in)

Step 1 Strip down
1.
Remove necessary components per Honda service manual for 250mm tire kit install.
(This includes seat, fender, wheel, final drive, exhaust, swing arm.) Leave the stock shock in place.
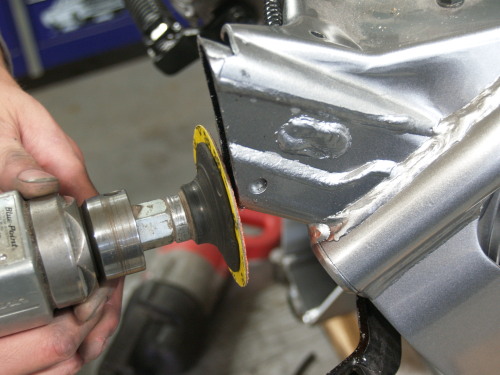
Step 2 Frame cutting
2. Cut supplied paper frame cutting template and tape it to the frame.
This step is assuming the use of the Sumo-X fat fender.
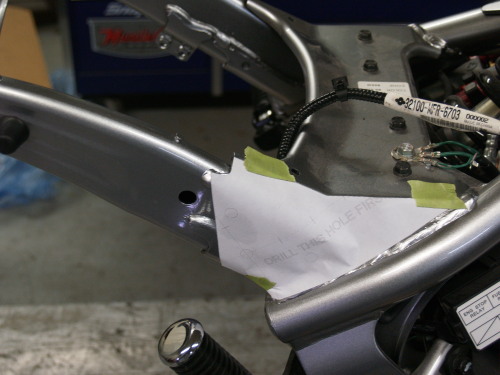
3. Note alignment of the rear of the template.
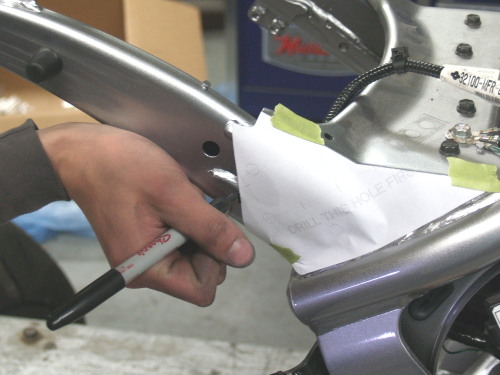
4. Mark the frame rails with a marker. Hint; if you have a black frame you can lay masking tape down first.
5. Cut the rear sub frame. Hint, start your saw perpendicular to the frame to help keep from walking, and then cut vertically, 90 degrees from the floor.
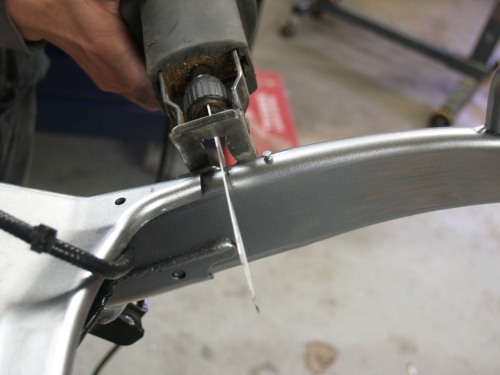
Note; dont cut all of the way through, then break the last 1/16.
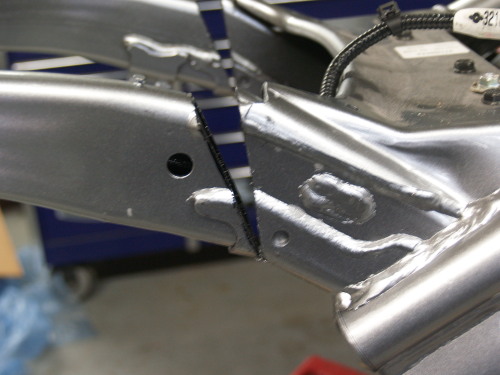
Now do a light finish grind.
Air Lowering System (ALS) install only.
Photos 6a to 6d
Install ALS front brackets; replace rear motor mount bolts with new supplied bolts.
6a
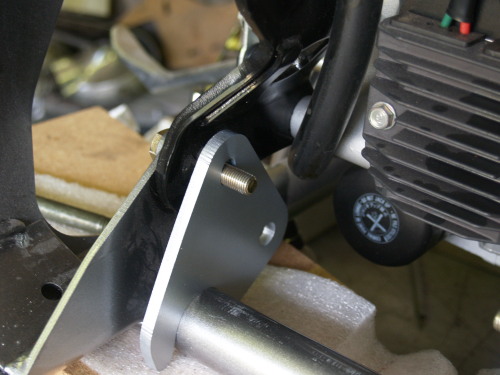
6b Note; there is a right and left side to the front ALS brackets.
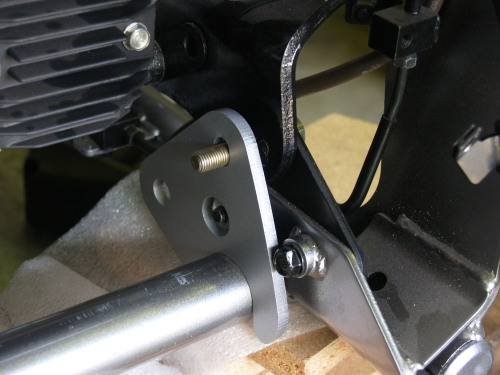
6c Air bag to swing arm w/ pump bracket.
6d
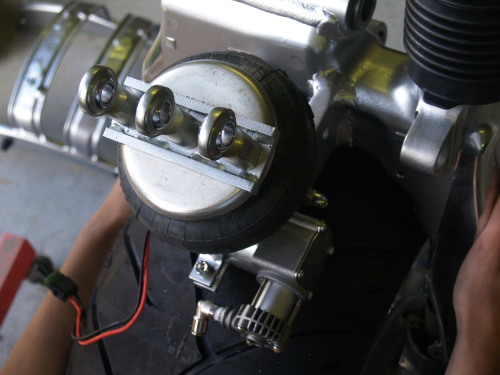
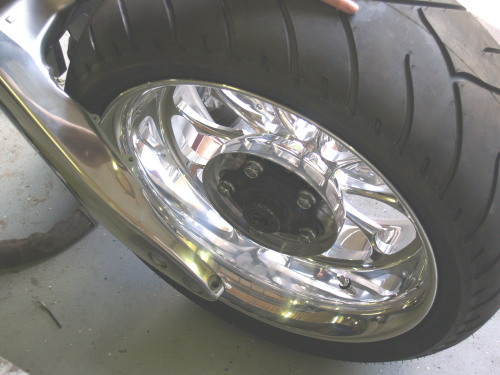
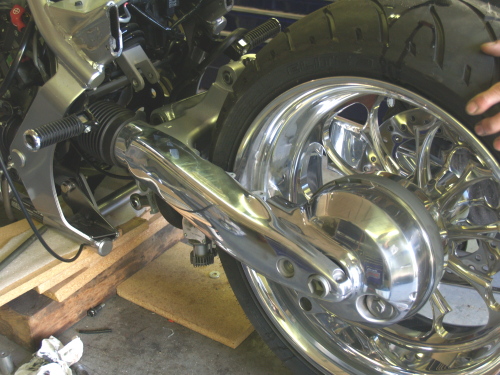
Wheel / Swing arm install
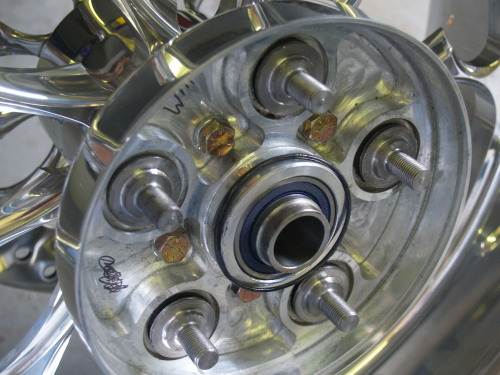
7. Transfer final driven flange, o ring, and right dust seal from stock wheel to the new Sumo wheel. Note; check and make sure the distance spacer in installed on the left side bearings. Use moly grease around the boss and spacer.
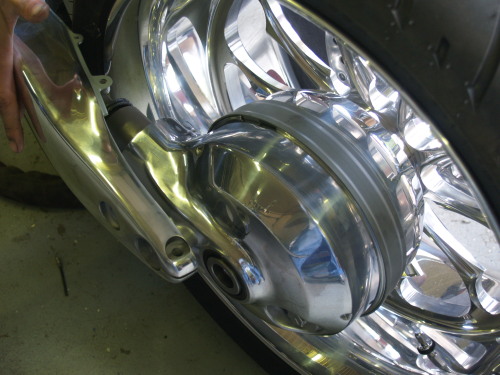
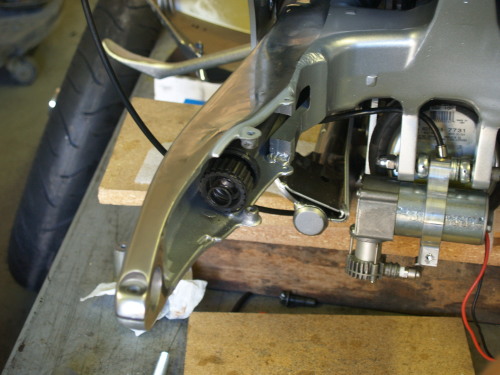
8. Method 1 of swing arm assembly install. Position swing arm around the wheel/tire assembly, then slid in the final drive with the prop shaft installed on the final drive and align to the wheel, then install the axel temporally. Photos 9a and 9b
9a.
9b.
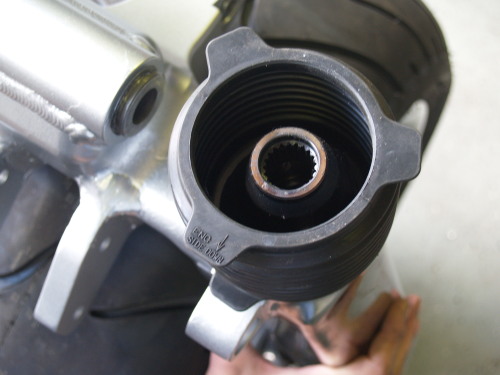
10. Install u-joint and rubber boot.
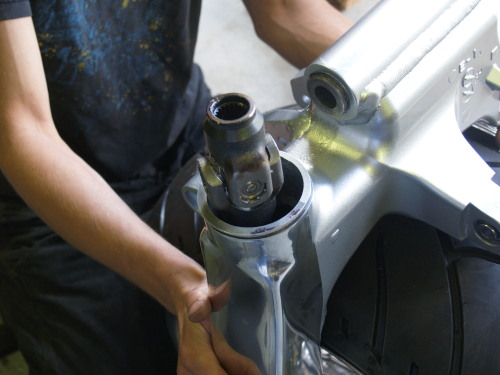
Note the position text on the boot.
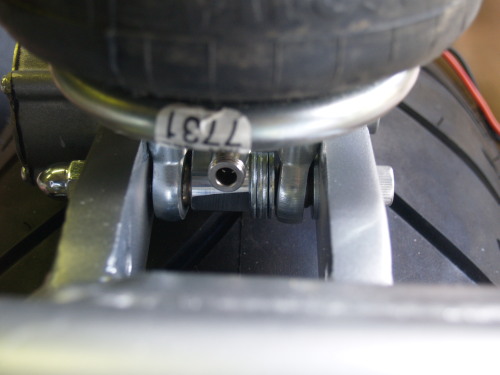
11. Install complete assembly into the bike at this point. Note; It may be easier to bolt front air bag first, then the pivot bolt, then the shock bolt.
Method 2 of swing arm assembly install.
Insert the prop shaft into the swing arm, then install the u-joint to the prop shaft and leave them in the arm loosely.
Install the swing arm into the bike.
Install the u-joint into the transmission output shaft. (Do this by using the rear of the prop shaft to help alignment.)
This is a little tricky but it can be done.
Now roll the wheel and final drive into place then carefully guide the final drive it into the splines on the prop shaft.
Note; the right brake bracket and spacer cannot be in at this time.
Install axel bolt, right spacer and brake bracket.
Tighten all bolts per Honda service spec.
Move on to Sumo fender for the best look your Fury can get!
Sumo-X Fender installation instructions.
1. Tape the frame for protection. Use 10 to 12 layers of 3/4" masking tape. Notice only 1 layer of tape is around the lower corner.
2. Carefully grind the high spots on the welds, don't over grind, only grind the highest areas.
3. Fit the fender and note position. This fender pic is at the furthest position forward; go no further ahead than this and up to 1/4" toward the rear is fine.
3b. Use packing material to help steady and align the fender.
3c. Trick; use wooden paint sticks to help center the fender.
4. Use a tranfer punch, not a center punch, to mark your first drill hole. This is possibly the hardest and most critical part of the install. Fit the fender, punch, remove the fender, drill a 1/8" pilot hole, (through both layers of the frame) drill a 5/16" hole, fit the fender and install 1 bolt, don't tighten, then move on to the next hole checking for the fender to tire alignment every time.
Again fit fender, punch, remove fender and drill pilot, drill main, fit again. repeat these steps for the first 4 holes, once 4 bolts are in you can mark and drill the last 2 holes.
For the best results take your time on the fender install, this can take a few hours but this is time well spent.
Use new drill bits with a small abount of cutting oil, be carefull because there are a few holes that have some thick metal and you don't want to break the drill bit, again take your time on this step!!!
5. Filler Panel
Some light grinding on the back of the filler panel where it meets the fender may be needed, this depends on exact location of the fender when it was installed.
Fit the filler then drill the 2 holes that go to the fender (1/8").
Then install the screws through the filler and into the fender, do not overtighten these, if you need to make the 1/8" holes larger it's ok to do so but only do small sizing at a time. (Arrow 2)
Next mount the front tabs with the stock fasteners that came with the bike and mark the next 2 holes (Arrow 1), drill to 1/4", remove filler and install the supplied bolts, re-install and tighten the filler screws.
Seat Mod
This mod is not as hard as it looks, again take your time and re-fit as many times as needed.
1. Remove the staples from the seat cover and start to fit the seat with the cover taped back. Tuck the foam into the seat pan as shown. Mark and trim the seat pan 1/4" above the strut and follow the ark. This can be done with a jig saw, a side cutter or a good tin snips. Here again take your time , the seat may have to be fitted and removed many times, take a little material off at a time and keep checking the fit.
1b. Grind about 1/4 of the thickness off of the outer 2 rubber bumpers, this helps the seat sit down a little.
2. Once the seat pan is fitted it's time to cut the foam. Cut the foam flat on the bottom first, then lightly trim the corner. Do all of this off the bike.
2b The finishing can be done with 36 grit sand paper.
Note the rounded corners and also sand the edges of the plastic pan smooth.
Wrap the covering back on tha re-staple, be sure to pull out any wrinkles when you staple the cover.
Install just like the stock seat, check alignment of the holes and slot the mounting bracket where it mounts to the seat if you must
2c Install seat, Make sure you can start all of the bolts by hand.
3. Rear seat install.
Method 1; Install the rear seat to the front seat using the OE hardware and mark the location of the rear seat tab mount, drill and bolt the seat to the Sumo fender from the bottom up and use a short nut, make sure the bolt doesn't dig in to the rear seat cover. (This is a permanant mounting system.)
Method 2; Install the rear seat to the front seat using the OE hardware and remove the rear mounting tab all together. Use some vinyl chip guard to protect the paint on the fender. (This is a temporary mounting system.)
Method 3; Install the rear seat to the front seat using the OE hardware and use suction cups in place of the rubber bumpers. The rear hole must be drilled to fit the suction cup (.400") (We have these suction cups available) (This is a temporary mounting system.)
Method 3 photo;
Go have some fun now.
 (
(